Ube and matcha might not sound like an obvious pair, but once you try them together, it just clicks.
The ube brings a creamy, slightly nutty sweetness that leans dessert-like, while the matcha adds an earthy contrast that keeps everything balanced.
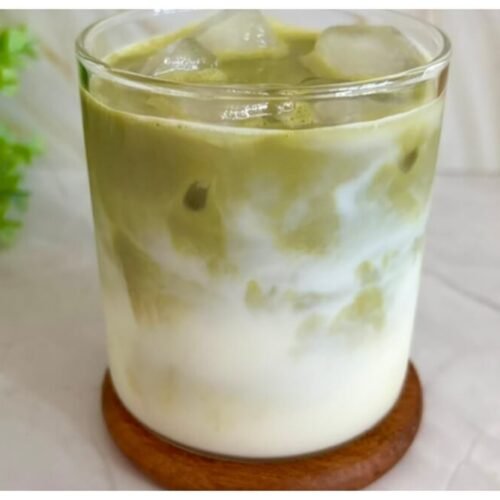
I keep coming back to this drink when I want something that feels a little different from a regular iced latte. It looks layered and fancy in the glass, but the process is simple once you know how to build it step by step.
I’ll walk you through exactly how to get smooth matcha, a creamy ube base, and clean layers that blend into a really satisfying drink.
Why This Iced Ube Matcha Latte Works
Ube is sweet, creamy, and a little nutty. Matcha is grassy and slightly bitter. But together, they balance each other in a way that just makes sense.
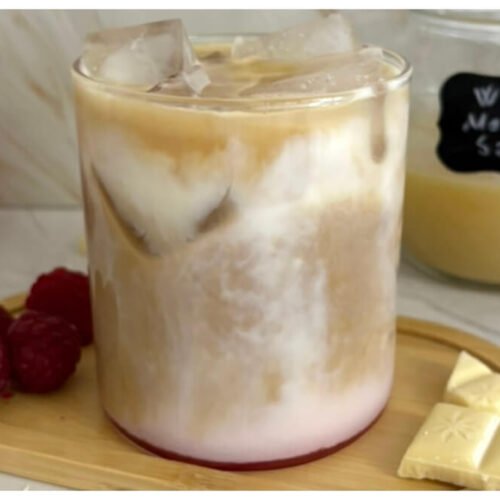
The ube layer gives you that dessert feel. Think vanilla, but deeper and a bit more rich. Then the matcha cuts through it so the drink doesn’t feel overly sweet.
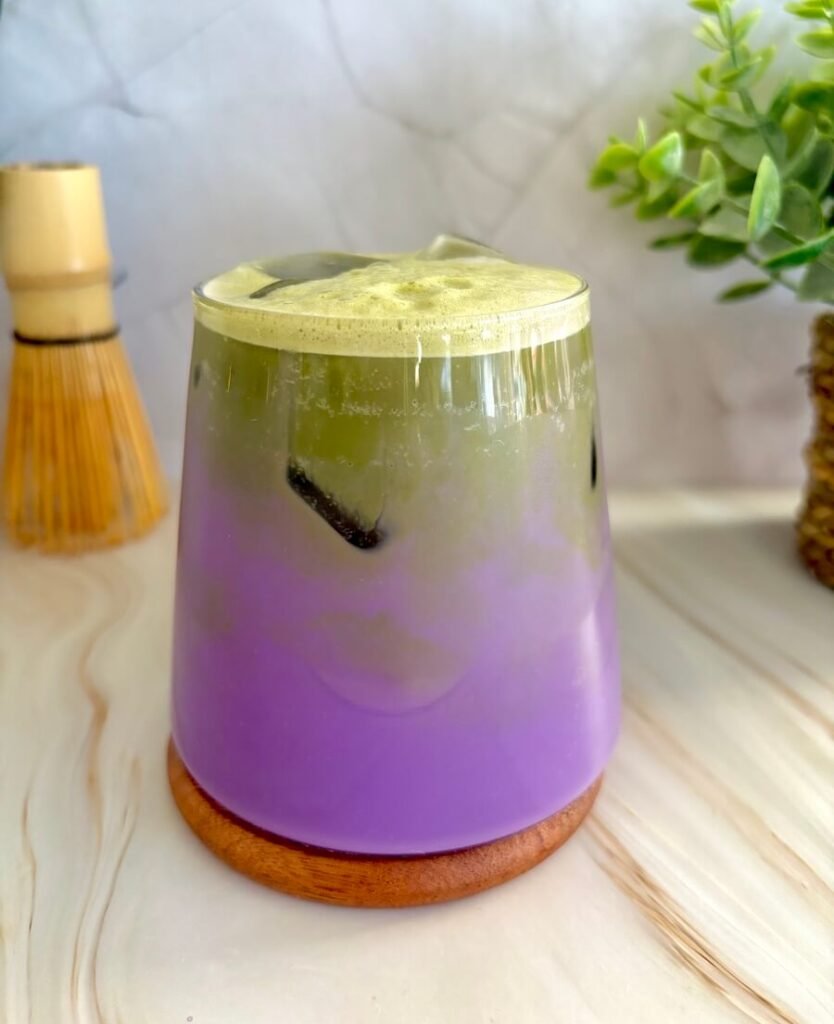
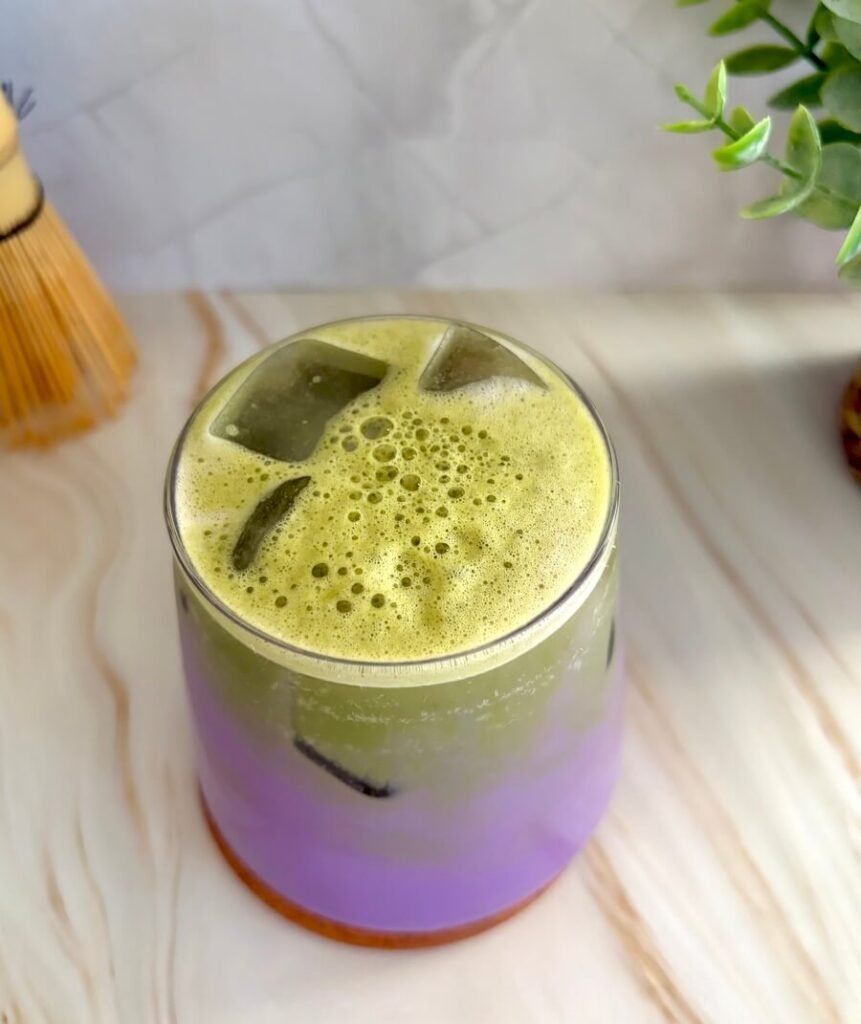
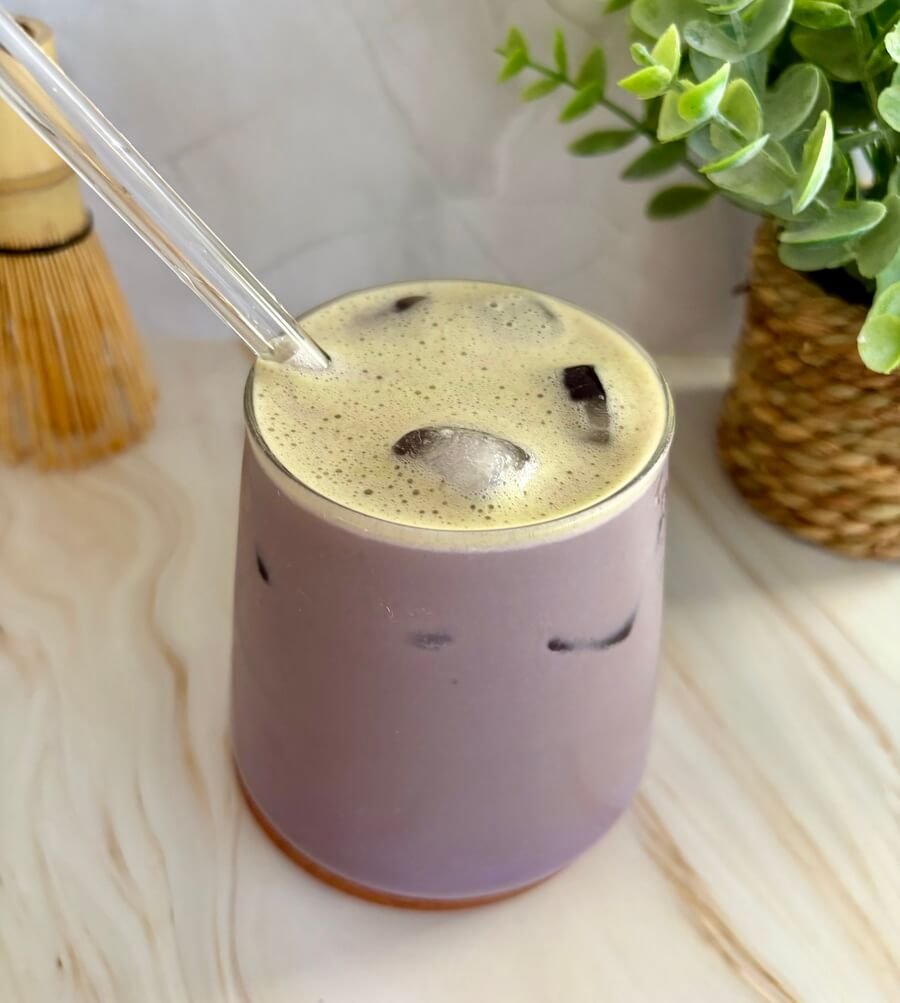
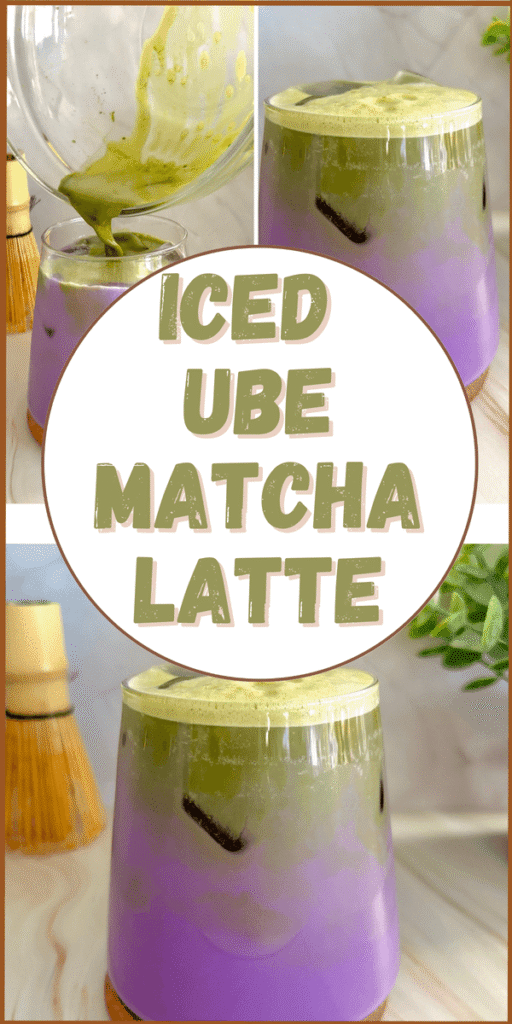
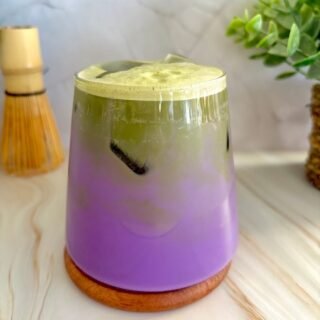
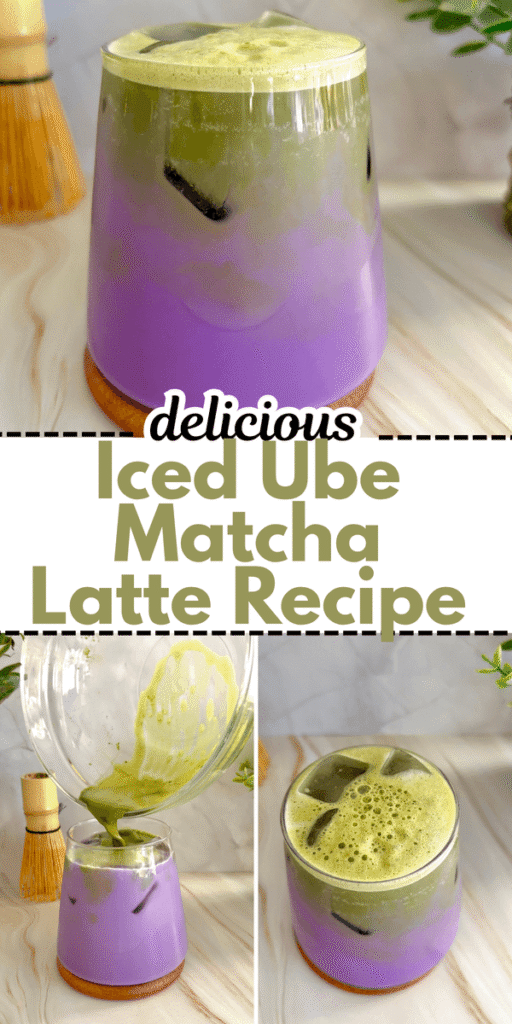
You also get that layered look with the purple base and green matcha on top.
It looks like something you’d pay $7–$9 for, but you can make it at home in minutes.
Ube Matcha Ingredients
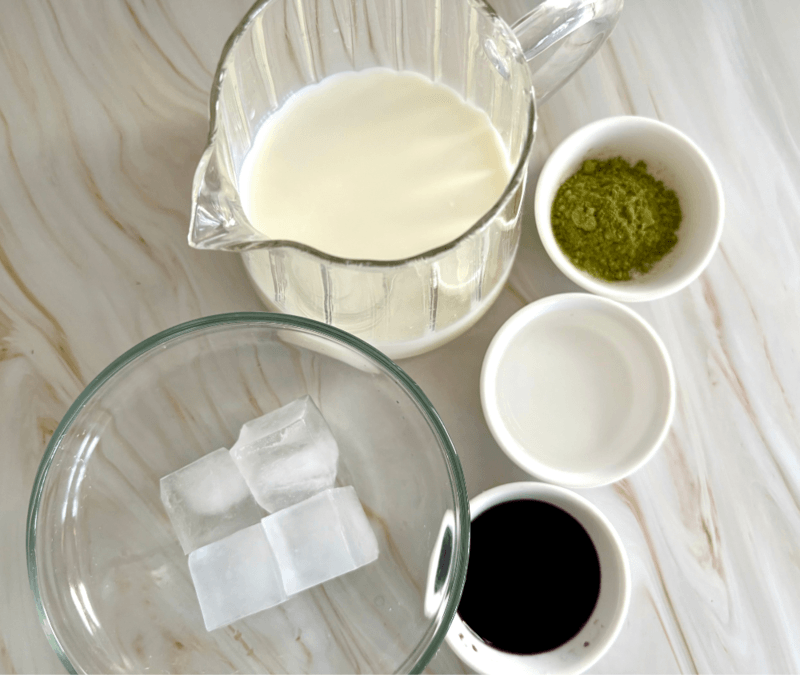
You’ll need ube extract, or ube halaya
This is where the flavor comes from. It’s sweet and thick, so you’ll mix it with milk to make it drinkable.
In terms of milk, I’ve tried this with:
- Whole milk → creamiest result
- Oat milk → slightly sweeter and works really well
- Almond milk → lighter but still good
Matcha powder
Use a good-quality matcha if you can. Ceremonial grade is best
Cheap ones tend to taste bitter and muddy.
Sweetener (optional)
You might not need it because ube jam is already sweet.
I sometimes add a little maple syrup or simple syrup to the matcha.
Hot water (for matcha)
This helps dissolve the matcha smoothly so you don’t get clumps.
Ice
Don’t skip this. It helps create the layers and keeps everything separate.
Step-by-step: how to make iced ube matcha latte
Step 1: Prepare the ube base
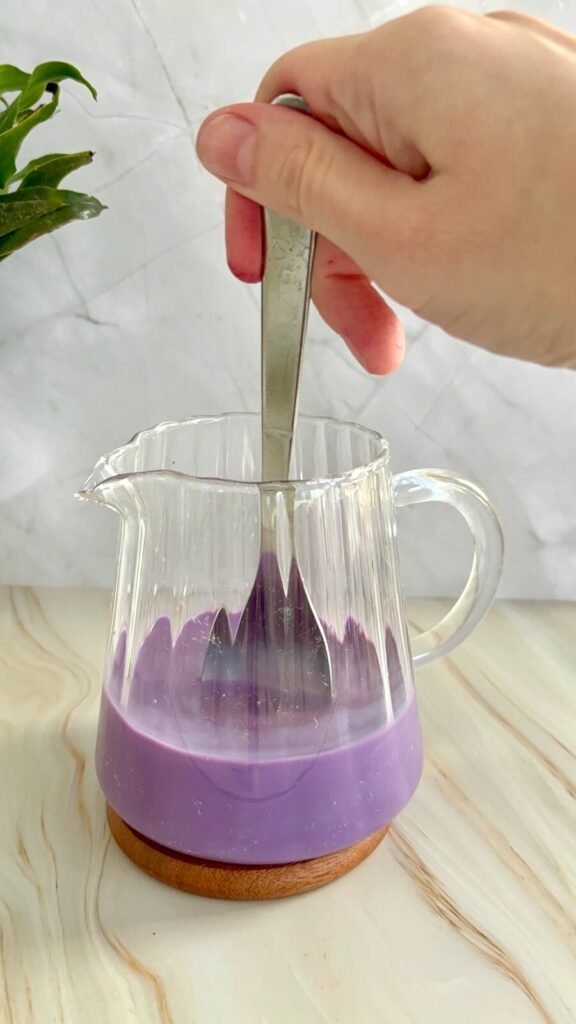
Start with about 2–3 tablespoons of ube jam or ube extract in a small bowl or glass.
Add a splash of milk (around 2–3 tablespoons) and mix until smooth. You want it to loosen into a thick but pourable consistency.
If it’s too thick, add a bit more milk.
If it’s too thin, add a little more ube.
Once smooth, pour this mixture into your serving glass.
Step 2: Add ice
Fill the glass with ice over the ube layer.
Don’t rush this step. The ice helps keep the layers separate and gives you that clean look.
Step 3: Pour the milk layer
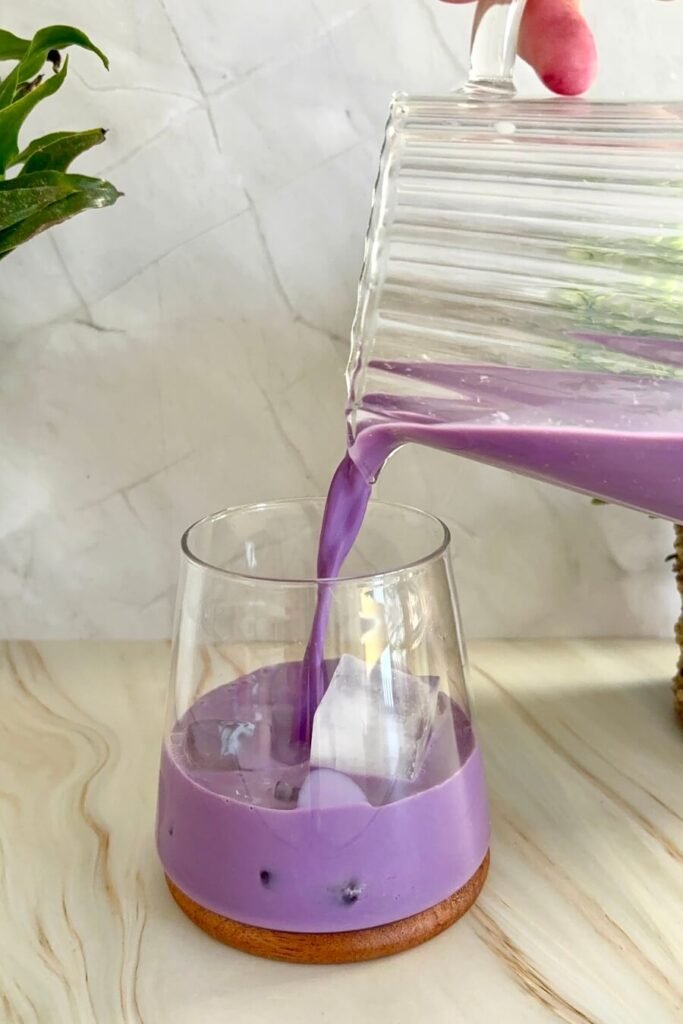
Slowly pour about ¾ cup of milk over the ice.
Tip: Pour it gently over the back of a spoon if you want extra clean layers.
At this point, you’ll already see the purple bottom forming.
Step 4: Make the matcha
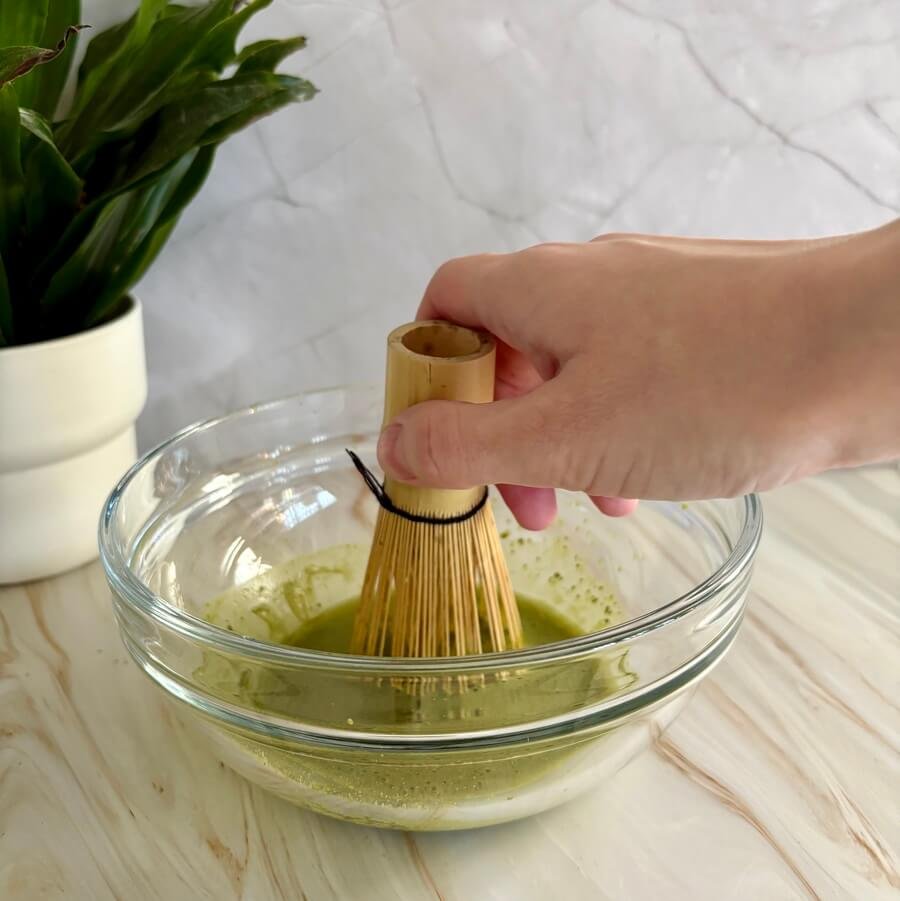
In a small bowl, add:
- 1–2 teaspoons matcha powder
- 2 tablespoons hot (not boiling) water
Whisk until smooth. If you have a bamboo whisk, use it. If not, a small regular whisk or even a milk frother works.
You’re aiming for a smooth, lump-free matcha.
Taste it here. If it’s too strong or bitter, add a little sweetener.
Step 5: Layer the matcha on top
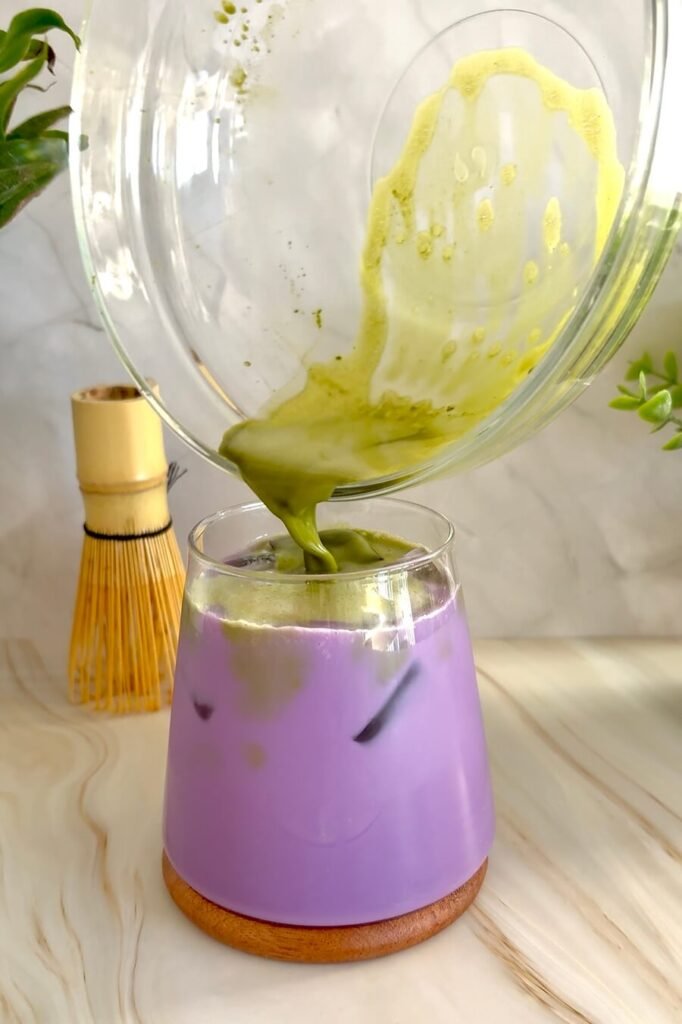
Slowly pour the matcha over the milk layer.
Again, use the back of a spoon for a more defined layer.
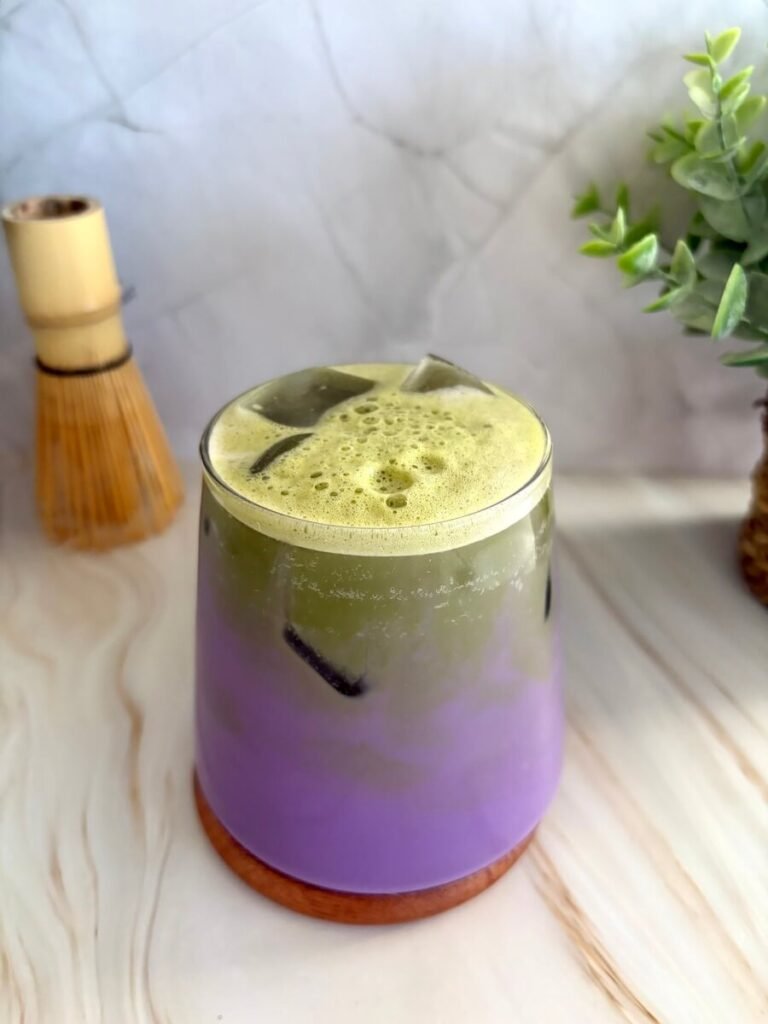
Step 6: Mix before drinking
You can leave it layered for photos, but before drinking, give it a good stir.
This blends everything into a creamy, slightly earthy, slightly sweet drink that tastes better than it looks.
Tips for the Best Ube Matcha Latte
Here are a few tips for the best iced ube matcha latte:
- Use room temperature ube jam: Cold ube is harder to mix and can stay clumpy.
- Sift your matcha: If your matcha tends to clump, sift it before adding water.
- Control sweetness carefully: Ube is already sweet, so don’t overdo it with extra sugar.
- Use clear glass: Not required, but it makes the layers look really good.
Easy Variations to Try
Make it dairy-free: Use oat milk or almond milk. Oat milk is my go-to because it keeps the drink creamy.
Add vanilla: A drop of vanilla in the milk layer makes the whole drink feel more like a dessert.
Make it stronger: Add an extra teaspoon of matcha if you want more of that earthy flavor.
Turn it into a blended drink: Blend everything with ice instead of layering. You lose the look, but the texture is more like a frappé.
Add espresso (for a twist): Not traditional, but if you like “dirty matcha,” a shot of espresso actually works with ube.
Common mistakes to avoid
These are the most common mistakes that happen when making ube matcha latte:
- Clumpy matcha: This usually happens if you skip whisking properly. Take an extra 20 seconds here—it’s worth it.
- Too thick ube layer: If you don’t loosen it with milk, it just sits at the bottom and doesn’t mix well.
- Overly sweet drink: Taste as you go. Ube varies in sweetness.
- Losing the layers: Pour too fast and everything blends immediately. Slow pouring fixes this.
How to Store (if you want to prep ahead)
You can prep parts of this drink in advance:
- Ube mixture: store in the fridge for up to 3 days
- Matcha: best made fresh
When ready, just assemble with ice and milk.
Iced Ube Matcha Latte
Ingredients
- 2-3 tbsp ube extract or ube jam
- ¾ cup milk
- 1-2 tsp matcha powder
- 2 tbsp hot water
- ice
- 1-2 tsp sweetener, such as simple syrup, or maple syrup optional
Instructions
- In a small bowl, mix ube powder or jam with a splash of milk until smooth and pourable.
- Add the ube mixture to the bottom of a glass.
- Fill the glass with ice.
- Slowly pour milk over the ice.
- In a separate bowl, whisk matcha powder with hot water until smooth.
- Add sweetener to the matcha if desired.
- Gently pour the matcha over the milk and ube layer.
- Stir before drinking and enjoy.
Notes
- Adjust sweetness depending on your ube extract or jam.
- Use oat milk for a creamier, slightly sweeter taste.
- Whisk matcha well to avoid clumps.
- For a stronger flavor, increase matcha to 2 teaspoons.
- Best served immediately after assembling.

Marina is the writer behind CozyCornerCharm. She grew up on Turkish coffee, later discovering specialty brewing through her first V60, which inspired her ongoing coffee journey. She has written for Craft Coffee Spot, Home Grounds, and Barista HQ and now shares her experience here on her own coffee corner.
[…] ube matcha latte […]